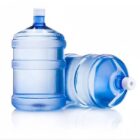

Here is something most people who own a 19-litre water dispenser do not know: your dispenser needs to be properly cleaned every 3 months — and most families in Pakistan have never cleaned theirs at all.
This is not a criticism. Nobody tells you this when you buy the dispenser. The salesperson focuses on features and price. The manual — if you can find it — has generic instructions in three languages, none of them particularly clear.
But the consequences of not cleaning your dispenser regularly are real. A dispenser that has not been cleaned for 6 months or more can harbour bacterial biofilm inside its water tank, on the tap mechanism, and around the inlet where the bottle neck sits. This means that even if you are using perfectly clean mineral water — which you are paying for specifically because of its purity — the dispenser itself can recontaminate it.
This guide walks you through the complete cleaning process clearly and practically. It takes about 30 to 45 minutes and needs to be done every 3 months.
What You Need Before You Start
Gather these items before beginning:
- White vinegar (food-grade) — available at any grocery store
- Unscented dish soap
- Clean soft cloth or sponge (dedicated to this task — not the same one used for dishes)
- Small bottle brush or pipe cleaner for the taps
- Clean bucket or large bowl
- Clean rubber gloves
- Fresh bottle of mineral water for the final rinse cycle
Optional but recommended:
- Food-safe sanitising solution such as Milton or similar (available at pharmacies)
Do not use bleach unless specifically recommended by your dispenser manufacturer — bleach residue in the water system is difficult to fully rinse out and harmful if consumed.
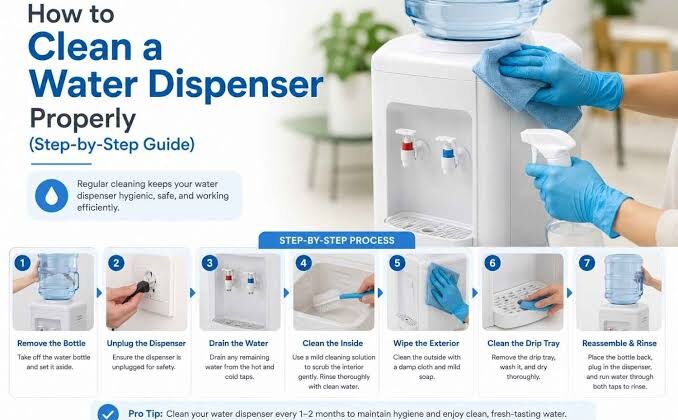
Step 1 — Unplug and Prepare (5 minutes)
Switch the dispenser off at the socket and unplug it completely. Never work on a plugged-in dispenser — the heating element and electrical components make this a safety issue.
If your dispenser has a hot water function, allow it to cool completely before starting. The hot water tank retains heat for 30 to 60 minutes after being switched off. Working on a hot dispenser risks burns.
Remove the current water bottle. If the bottle still has water in it, either use it up first or keep it aside to reload after cleaning.
Step 2 — Clean the Bottle Support Area (5 minutes)
The area at the top of the dispenser where the bottle neck sits — called the bottle support or needle — is one of the most important areas to clean. Every time you change a bottle, this area is briefly exposed to air and can accumulate dust, mineral deposits, and bacteria.
Using your soft cloth dampened with a white vinegar and water solution (equal parts), thoroughly wipe:
- The bottle support spike or needle
- The collar around the bottle opening
- The inner rim of the bottle inlet
- The top surface of the dispenser cabinet around the inlet
Allow the vinegar solution to sit for 2 to 3 minutes before wiping clean with a fresh damp cloth. Vinegar is effective against mineral scale buildup (the white chalky deposits you may notice around the inlet) and has mild antibacterial properties.
Step 3 — Clean and Drain the Internal Tank (15 minutes)
This is the most important step and the one most people never do.
Locate the drain plug on your dispenser — it is typically at the back near the bottom. Place your bucket below it before opening.
For cold-water tank: Open the cold water drain plug and allow all the water to drain completely into the bucket. Once drained, prepare a cleaning solution: mix 1 litre of clean water with 3 tablespoons of white vinegar.
Pour the vinegar solution into the empty cold tank through the bottle inlet at the top. Allow it to sit for 5 minutes — this dissolves mineral scale and addresses bacterial growth on the tank walls.
Drain the vinegar solution completely through the drain plug.
For hot-water tank (if applicable): Most dispensers have a separate drain plug for the hot water tank. After the unit has fully cooled, repeat the same process for the hot water tank — fill with vinegar solution, wait 5 minutes, drain completely.
Step 4 — Clean the Taps (5 minutes)
The taps are the most frequently touched and most bacteria-exposed components of your dispenser. They deserve careful attention.
Remove the tap handles if your dispenser allows this (many do — check your manual). Soak removable taps in your vinegar solution for 5 minutes.
For non-removable taps: Use a small bottle brush or pipe cleaner dipped in vinegar solution to clean inside the tap nozzle. This area accumulates mineral deposits and dried water residue that creates an ideal environment for bacterial growth.
Wipe the entire exterior of each tap with a vinegar-dampened cloth. Pay particular attention to the underside of the tap nozzle where water drips — this surface collects deposits quickly.
Step 5 — Clean the Drip Tray (3 minutes)
Remove the drip tray completely. Wash it with warm soapy water, rinse thoroughly, and dry before replacing.
The drip tray should be cleaned every 3 to 5 days during normal use — not just during the quarterly deep clean. A full drip tray left unchanged is a significant source of mould and bacterial growth that can affect the cleanliness of the tap area above it.
Step 6 — Wipe the Exterior (3 minutes)
Wipe the entire exterior of the dispenser cabinet with a clean damp cloth. Pay particular attention to:
- The front panel around the taps
- The top of the unit around the bottle inlet
- The back panel near the drain plugs
- Any ventilation grilles (dust here affects cooling performance)
Step 7 — Rinse Cycle (5 minutes)
This is critical. You must flush the vinegar solution completely from the internal system before using the dispenser again.
Load a fresh bottle of mineral water. Plug the dispenser back in. Allow the tanks to fill (this takes 2 to 3 minutes for most models).
Open both the cold water tap and (if applicable) the hot water tap and let approximately 2 litres flow through each — this flushes any remaining vinegar solution from the pipes and taps.
Taste a small amount of the water from each tap. There should be no vinegar taste. If you can still taste vinegar, flush another litre through each tap.
Signs Your Dispenser Needs Cleaning More Urgently
Clean more frequently than every 3 months if you notice:
- Unusual taste or smell in the water from the dispenser
- Visible mould or dark spots around the tap or drip tray
- White chalky mineral scale buildup around the bottle inlet
- The water tastes noticeably different from a fresh glass poured directly from the bottle
How Often to Clean — Quick Reference
| Component | Frequency |
|---|---|
| Drip tray | Every 3 to 5 days |
| Tap exterior | Weekly |
| Bottle inlet area | Every bottle change |
| Full deep clean | Every 3 months |
| Extra clean during summer | Every 2 months |
Clean Dispenser + Clean Water = Full Protection
A clean dispenser paired with high-quality mineral water is the complete picture. One without the other leaves a gap.
Dew Drops Fresh delivers pure, batch-tested mineral water in sealed 19-litre bottles free to homes across Islamabad and Rawalpindi. We also provide guidance to our customers on dispenser maintenance — because we care about the water being as clean at your glass as it was when it left our facility.
Order your next delivery: WhatsApp: +92 310 556 9289 Email: info@dewdropsfresh.com Website: dewdropsfresh.com